Introduction
As per MuleSoft MUnit is a powerful application testing framework built into Anypoint Studio, which enables developers to create, design and run unit tests on APIs and integrations created within Anypoint Studio. MUnit enables developers to catch any potential errors in their flows due to malformed payloads or other easily preventable errors.
It provides a full suite of integration and unit test capabilities, and is fully integrated with Maven and Surefire for integration with your continuous deployment environment. Running a test on a live system poses a huge risk, what if your code breaks your systems or deletes important customer data? Luckily MUnit is here to help you prevent a mistake such as this! Instead of making a change on a live system such as a database, you can simulate your existing systems in a mock, local environment, which lives solely on your computer. In this tutorial, we are going to cover some of the main features of MUnit, and cover how to host a mock database on your local machine to run unit tests.
Developing our flow
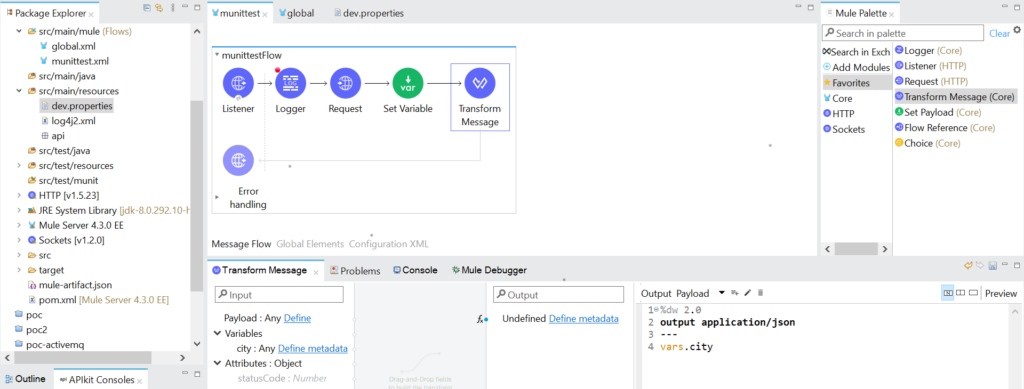
Here is a sample Mule application and we will be creating the MUnit test cases for this application with 100% coverage. Let’s set up our very first Munit test! To get started, go fo File -> New -> Mule Project, and name your project whatever you wish. On the main canvas, drag an HTTP connector from the Mule Palette into the flow. Click on the HTTP listener, and under Connector configuration, click the green plus to set up a default HTTP Listener Configuration. Under path, type /test and the save your flow.

Test the flow by right-clicking on the canvas, and selecting Run project. If you go into Postman, and send an HTTP post request to the address: http://localhost:8081/test, you should get a payload with returned as a JSON payload. Now, let’s set up a MUnit test to use a local database instead of our production database.

Setup the MUnit DB Server
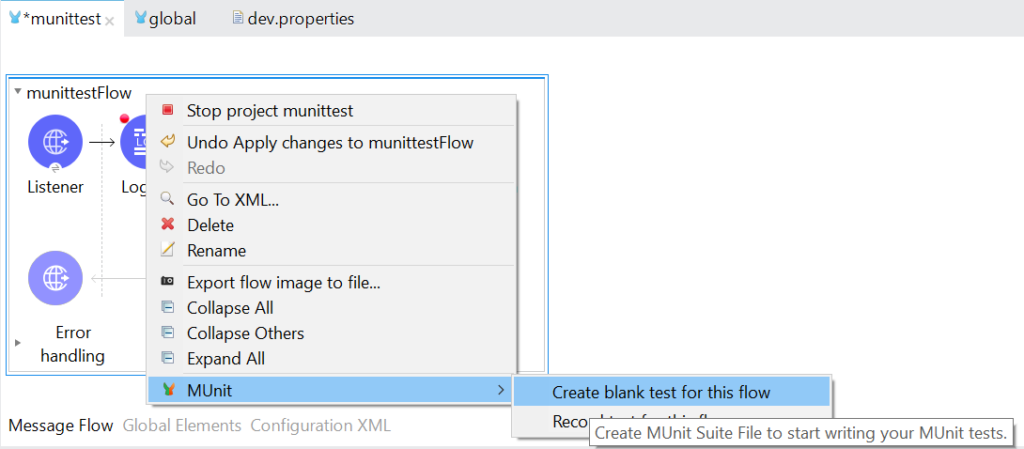
The first step to creating a MUnit test is to right-click on the flow, and select MUnit, and select Create new MUnit suite. MUnit -> Create blank test for this flow.

Now you will see a new file being created under src/test/munit folder, which contains a blank test case as shown below:

You can change the name of the test suite and the flow name as you wish. Simply click on flow-ref and press F3 to verify for which flow you have created the test case.
As the above flow is used to create new users, so we need to send a request right? To send a sample request, we will use either set payload or set event. I use set event most of the times as I can send payload, attributes, variables and even an error too.
So simply drag and drop the set event before the flow reference and configure as shown below.
Follow Me
If you like my post please follow me to read my latest post on programming and technology.

Leave a Comment
You must be logged in to post a comment.